Reference
This procedure describes the standard Enter Invoice Line screen. If your company uses supply chain procurement, see "Entering Invoice Lines - Supply Chain (v2.8)" instead.
You add items to an invoice, picking slip or quote using the Enter Invoice Line screen. You also use this screen to maintain the items associated with an invoice, picking slip or quote.
|
|
|
Reference This procedure describes the standard Enter Invoice Line screen. If your company uses supply chain procurement, see "Entering Invoice Lines - Supply Chain (v2.8)" instead. |
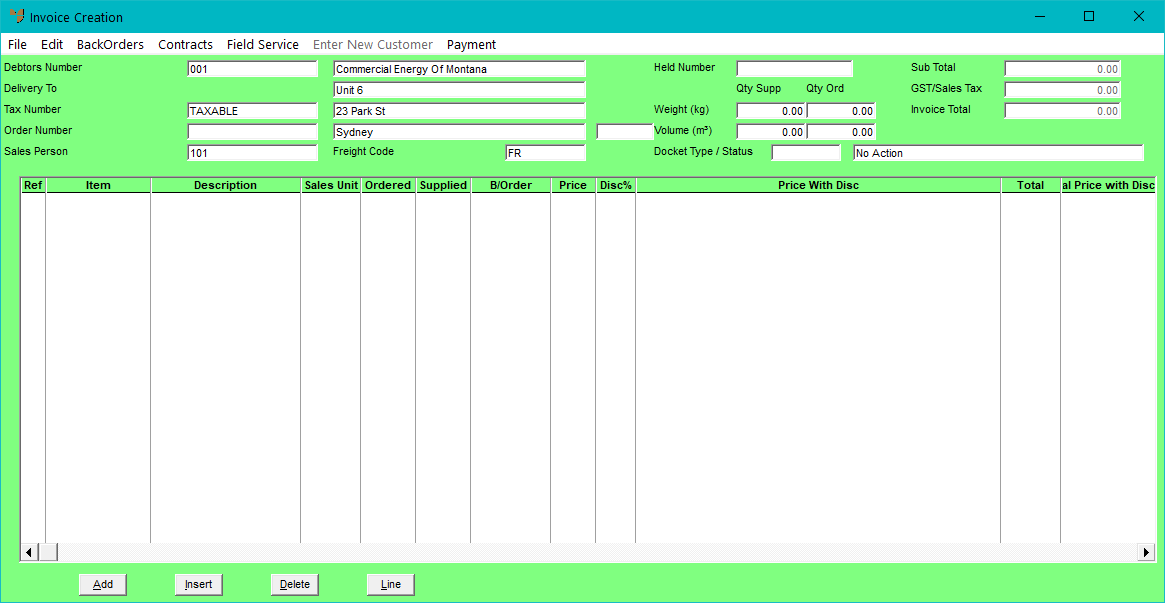
Refer to "Creating a New Invoice, Picking Slip or Quote" or "Recalling an Invoice, Picking Slip or Quote".
Micronet displays the Invoice Creation screen.
|
|

|
Technical Tip 2.8 Feature If you recalled a previously created invoice, picking slip or quote, the Held Number and Docket Type fields on the Invoice Creation screen show the invoice/slip number and the docket type you have loaded, e.g. Held Invoice, Picking Slip, Quote, etc. |
|
|
|
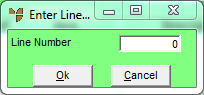
Technical Tip If the invoice contains a large number of lines, you can quickly find the line you want by selecting the Line button. Enter the number of the line you want to maintain then select Ok.
Enter Line Number |
If you selected to add, insert or edit an item, Micronet displays the Enter Invoice Line screen.
![]()
|
|
Field |
Value |
|---|---|---|
|
|
Item Number |
Enter the ID of the item to be sold to your customer. You can also press Tab or Enter to select an item. When creating invoices for colour/size items, you can enter each colour/size item individually. Alternatively, you can enter the colour/size master item and enter individual item quantities using the colour/size matrix. If you enter a colour/size master item in this field, Micronet displays the colour/size matrix where you enter the quantities you want to invoice for each colour/size combination in the grey cells then choose the Ok button. For more information about colour/size items, refer to "Working with Colour/Size Tables" in the Advanced Distribution Training Manual. |
|
|
Item Description |
Micronet displays the description of the selected item. |
|
|
|
Reference If your user security is set up to allow the creation of temporary items during transaction processing, Micronet displays a Create Item button to the right of the Item Number field. See "Enter Invoice Line - Creating Temporary Items (v2.7)" or "Enter Invoice Line - Creating Temporary Items (v2.8)" for more information about creating temporary items. |
|
|
|
Technical Tip 2.8 Feature
Select the Exit button when you have finished.
|
|
|
Warehouse |
Micronet displays the warehouse from which the item will be supplied from the Invoice Header screen. |
|
|
|
Technical Tip 2.8 Feature If you select an item that has been set up with unit recognition, Micronet automatically displays the Unit Recognition screen so you can enter the invoice quantity in the appropriate units (e.g. square metres, boxes, pallets, etc.). For tile products, and where multi bins are turned on but your user ID does not allow you to edit multi bins, Micronet skips the Unit Recognition screen and goes straight to the Edit Units screen where you can enter the quantity ordered in the correct units. |
|
|
Sales Person |
Micronet displays the salesperson entered against this invoice from the Invoice Header screen. |
|
|
Free Stock |
Micronet displays the quantity of the item available. |
|
Consignment Stock |
If the item is consignment stock, select Consignment. Otherwise, select Normal. This field is only enabled if the Allow Consignment Stock field on the Inventory Configuration screen is set to Yes – see "Edit - Program - Inventory". |
|
|
Cost |
Micronet displays the buy price for the item from the Item master file – see "File - Inventory - Sell Price". |
|
|
GST/Sales Tax |
Micronet displays the GST or sales tax applied to this item. |
|
|
Ordered |
Enter the quantity of the item required for this invoice, picking slip or quote. Micronet defaults the ordered amount to 1 unit, unless the free stock is less than 1 or if there are minimum units set up for the item. If alternate units have been setup, the quantity is according to the alternate unit. For more details on alternate units, see "File - Product Category - Alt Units" and "File - Inventory - Extra". If the picking slip line is linked to a backorder line, you can't change the quantity ordered. |
|
|
|
Technical Tip
If Micronet has been setup to use the Main Bin Only or Priority Order and you do not have authority to edit bin locations, the selection of bins will be automatic and performed in the background. Note that this feature does not apply in Micronet 2.8 when Supply Chain is turned on. 2.8 Feature
|
|
|
Supplied |
When you enter a value in the Ordered field, Micronet checks the stock available. If sufficient stock is available, this field displays the same quantity as the Ordered field. If there is not enough stock available, Micronet displays the quantity available. Alternatively, you can overwrite this value with the quantity supplied. If you have loaded a quote, the quantity displayed in this field depends on your settings in the Loading Quotes - Set Qty Delivered and Saving Quotes - Set Qty Delivered fields on the Invoicing Configuration screen – see "Edit - Program - Invoicing". For example, Micronet may have saved your original quantity, reset it to the free stock quantity, or reset it to the quantity ordered. You can change this value if required. |
|
|
Backordered |
If not enough stock is available, Micronet displays the difference between the values in the Ordered and Supplied fields. If this customer accepts backorders as setup in the Debtor master file, Micronet puts the balance in the backordered quantity. |
|
|
Notional Quantity |
Notional quantities are used where the sales quantity is different to the ordered quantity for orders – for example, for meat supplies where orders are in quantities and sales are in kilograms, etc. This field is only enabled if the Use Notional Quantities field on the Inventory Configuration screen is set to Yes – see "Edit - Program - Inventory". |
|
|
Delivery Date |
Enter or select the delivery date for the item. |
|
|
Sales Unit |
Micronet displays the sales unit for the item from the Item master file – see "File - Inventory - Item". |
|
|
Unit |
Micronet displays the unit of measure for the item from the Item master file, e.g. EA for each – see "File - Inventory - Item". |
|
|
Line Number |
2.8 Feature This field is only displayed if the Allow Editing of Lines Numbers field on the Invoicing Configuration screen is set to Yes – "Edit - Program - Invoicing". It relates to EDI orders imported to Micronet by Data.Connect. If this field is displayed, you can edit the invoice line number that is set by Data.Connect. |
|
|
Price |
Micronet displays the default selling price for the item according to the settings in the Debtor master file. This may be the debtor default price, a contract price, the price calculated according to a discount matrix or a special price. The words "Contract Price" or Special Price" – along with the contract number or special price name – are displayed above the Price field if applicable. The expiry date of the contract or special price is also displayed in Micronet 2.8 (2.8 feature). Note that the contract price always overrides the debtor default price, discount matrix and special price. For more information on how Micronet calculates prices, see "How MDS Calculates Prices During Order Entry". You can change the price if you have the appropriate user access. Select the price break for the item. Micronet displays the selected item price. If you select Nett, enter the item price. |
|
|
|
Technical Tip You can only change invoice pricing if the Override Invoice Pricing field on the User File Update screen - MDS Security tab is set to Yes – see "Maintenance - Edit UserIDs - 4. MDS Security". If you do, details are stored in the Price Override Audit file for management reporting purposes. If this is a contract item for this debtor, you can't change the invoice pricing if the Prevent Disc Change field is set to Stop all Prices in the Debtor Contracts master file – see "Maintaining Items Included on the Contract". |
|
|
Nett Price |
Micronet calculates the net price based on the debtor/item pricing matrix. If you selected Nett in the Price field, you can enter a fixed price. When you do this, details are stored in the Price Override Audit file for management reporting purposes. |
|
|
|
Technical Tip You need to be aware of whether your net prices include or exclude GST – see "Edit - Program - Tax". 2.8 Feature Inc or Ex is displayed next to the Nett Price field to show whether the net price includes or excludes GST. |
|
|
Discount |
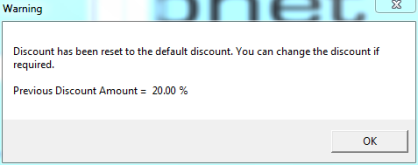
If the debtor has a default discount matrix assigned in the Debtor master file, Micronet calculates and displays the applicable discount. Alternatively, enter the amount or percentage of any discount that applies to this invoice. You select the type (e.g. dollar amount or percentage) in the Discount Type field. If you want to assign the discount to specific discount categories, select the Dis button – see "Enter Invoice Line - Dis". If the Display Warning When Discount Changes field is set to Yes on the User File Update screen - MDS Security tab (see "Maintenance - Edit UserIDs - 4. MDS Security"), and:
Micronet displays a message that it has reset the discount to the default.
Select OK and change the discount if required. |
|
|
Discount Type |
If you entered a discount in the previous field, select the discount type. Options are:
|
|
|
Unit Price with Disc |
2.8 Feature Micronet displays the net unit price minus any discount. |
|
|
Line Total |
Micronet displays the total value of the line minus any discounts. |
|
|
GP Percentage |
Micronet calculates the gross profit percentage using the values in the Cost, Price and Discount fields. If you want to set your GP percentage based on a different cost price from an alternate supplier, select the GP button. For more information, see "Enter Invoice Line - GP". |
|
|
|
Technical Tip If there is no stock on hand of the item, the Line Total and GP Percentage fields both display zero. |
|
|
Line Type |
Micronet allows you to select different line types for each line on an invoice, allowing each invoice line to be dissected to a different GL account. While the default line type of Normal relates to normal stock items, you might want to change the line type to charge customers for, say, freight items or labour items. Select the line type for this invoice line if required. For more information about invoice line types, see "File - Invoice Type". |
|
|
Important Information |
Micronet displays any added text in the Item master file that is assigned to display as important information on invoices. |
|
|
|
Technical Tip 2.8 Feature If the selected item has FIFO/serial numbers activated and this is the first time you have selected this product on this order, Micronet automatically displays the Select Serial Numbers screen with a list of all serial numbers for the selected item – see "Enter Invoice Line - Serial (v2.8)". |
Micronet saves the details of the item you have added to this invoice, picking slip or quote. If you selected to add an item, Micronet redisplays the Enter Invoice Line screen so you can add further items to this invoice, picking slip or quote.
Micronet redisplays the Invoice Creation screen showing all the items added to this invoice, picking slip or quote.